Continuing from my last post, here, let’s add the ability for an ASP.NET endpoint to queue a message to RabbitMQ. The source code can be found on Github here, please use that as a reference.
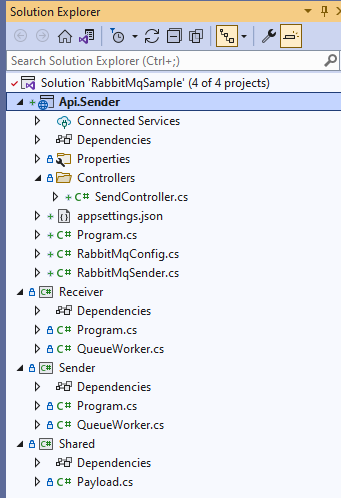
First thing to do is to add an ASP.NET Core project to the solution. Right-click on the solution and select “Add New Project” and then select “ASP.NET Core Web API” and make sure it’s for C#. Next, set a name then choose .NET 6.0. I named it “Api.Sender”.
Configuration
First, I created the RabbitMqConfig.cs file which contains the configuration, loaded from the appsettings file, for RabbitMQ.
namespace Api.Sender
{
    public class RabbitMqConfig
    {
        public string HostName { get; set; }
        public string QueueName { get; set; }
        public string Username { get; set; }
        public string Password { get; set; }
    }
}
This contains everything to configure RabbitMQ for sending packets onto a queue.
Creating the RabbitMQ Sender service
Next, I created the service used to send the payload. NOTE: this is not a Windows service or anything like that, it’s a class that is injected into the controller and used there.
using Microsoft.Extensions.Options;
using RabbitMQ.Client;
using Shared;
using System.Text;
using System.Text.Json;

namespace Api.Sender
{
    public interface IRabbitMqSender
    {
        void SendMessage(string message);
    }

    public class RabbitMqSender : IRabbitMqSender
    {
        private readonly string queueName;
        private readonly IConnection connection;
        private readonly IModel channel;

        public RabbitMqSender(IOptions<RabbitMqConfig> cfg)
        {
            queueName = cfg.Value.QueueName;

            var factory = new ConnectionFactory() { HostName = cfg.Value.HostName };
            factory.UserName = cfg.Value.Username;
            factory.Password = cfg.Value.Password;
            connection = factory.CreateConnection();
            channel = connection.CreateModel();
            channel.QueueDeclare(queue: cfg.Value.QueueName,
                                durable: true,
                                exclusive: false,
                                autoDelete: false);
        }

        public void SendMessage(string message)
        {
            var payload = new Payload()
            {
                Message = message
            };

            var properties = channel.CreateBasicProperties();
            properties.Persistent = true;

            var body = Encoding.UTF8.GetBytes(JsonSerializer.Serialize(payload));
            channel.BasicPublish(exchange: string.Empty,
                routingKey: queueName,
                basicProperties: properties,
                body: body);
        }

        ~RabbitMqSender()
        {
            if (connection is not null)
            {
                channel.Close();
                connection.Close();
                channel.Dispose();
                connection.Dispose();
            }
        }
    }
}
If you’ve read the previous post, this should look quite familiar. In the constructor, I inject the configuration, and use it to generate the connection and channel for RabbitMQ. I also store the queue name, and call ‘QueueDeclare’ which will create the queue if it’s not already created.
In the “SendMessage” function, I create the payload object using the message, then, I set the properties to persist on disk, generate the data to go onto the queue from the payload using the JSON serializer and converting that to a UTF byte array. Finally, I call “BasicPublish” on the channel.
In the destructor, I close and dispose of the channel and connection if they’re not null.
Wiring It up in Program.cs
Ok, so next thing to do is wire up the service and configuration files and let’s open up CORS since that’s always an issue.
using Api.Sender;

var builder = WebApplication.CreateBuilder(args);

builder.Services.AddControllers();
builder.Services.AddEndpointsApiExplorer();
builder.Services.AddSwaggerGen();

var rabbitMqConfig = builder.Configuration.GetSection("RabbitMqConfig");
builder.Services.Configure<RabbitMqConfig>(rabbitMqConfig);
builder.Services.AddScoped<IRabbitMqSender, RabbitMqSender>();

builder.Services.AddCors(options =>
{
    options.AddDefaultPolicy(
        builder =>
        {
            builder.AllowAnyOrigin()
            .AllowAnyHeader()
            .AllowAnyMethod();
        });
});

var app = builder.Build();

// Configure the HTTP request pipeline.
if (app.Environment.IsDevelopment())
{
    app.UseSwagger();
    app.UseSwaggerUI();
}

app.UseCors();
app.UseHttpsRedirection();

app.UseAuthorization();

app.MapControllers();

app.Run();
First thing of interest, is obtaining the rabbitMqConfig from the appsettings.json file. Then, I use that configure the RabbitMqConfig class (basically, this will copy from appsettings to RabbitMqConfig.cs class). Then, I add the RabbitMqSender.cs as a scoped service. (Notice, this uses an interface that the RabbitMqSender.cs class implements. Gotta love Dependency Injection!)
After that, I setup CORS to allow any client/header/method which basically opens it up to anybody. In production, you may want to set at least set the origin so not everybody can connect to your API. Also, after the app is built, I called “app.UseCors()”. Without this, CORS will not function.
Setting up the Send Controller
Next, I generated a controller, called “SendController.cs”, and set that up to send messages to the RabbitMQSender service.
using Microsoft.AspNetCore.Http;
using Microsoft.AspNetCore.Mvc;

namespace Api.Sender.Controllers
{
    [Route("api/[controller]")]
    [ApiController]
    public class SendController : ControllerBase
    {
        private readonly IRabbitMqSender rabbitMqSender;

        public SendController(IRabbitMqSender rabbitMqSender)
        {
            this.rabbitMqSender = rabbitMqSender;
        }

        [HttpPost, Route("")]
        public IActionResult SendMessage([FromBody] string message)
        {
            if(string.IsNullOrWhiteSpace(message))
            {
                return BadRequest();
            }
            rabbitMqSender.SendMessage(message);
            return Ok();
        }
    }
}
First, notice that the IRabbitMqService is injected into the constructor of the class. This was configured in the Program.cs file. From there, I created a “SendMessage” endpoint that’s an HTTP POST call, and has the base route. Inside of this function, I check if the message is null or empty/whitespace and, if it is, then return a BadRequest (400 response). If not, then it calls “SendMessage” on the rabbitMqSender object. Then, it returns an Ok (200 response).
Running the Applications
To get everything running, start the “Api.Sender” and the “Receiver” projects at the same time. Since this project uses Swagger, we can call the endpoint from the browser that opens up. Type a few things into the Swagger endpoint, and watch the receiver application display the messages.
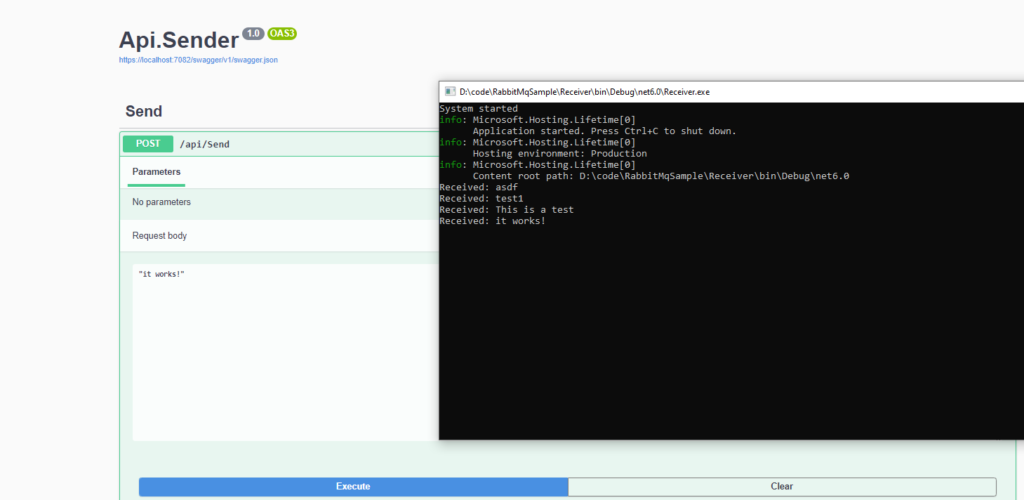
Great! We have a functioning REST endpoint that sends messages to a Windows Service using RabbitMQ! Thanks for stopping by.