In the previous post, we setup Auth0 and an Angular SPA to allow users to login and logout. Now, I’d like to setup a .NET 6 Web API and communicate with it, using authentication, from the Angular SPA. The Angular SPA will pass a JWT (oauth2) bearer token to the API which will authenticate using it. The source code for this blog and the previous can be found on Github here.
First thing to do is setup the API in Auth0. Login to Auth0 and navigate to Applications -> APIs and then select ‘Create New’.

Auth0 will display a modal dialog that needs to be filled in.
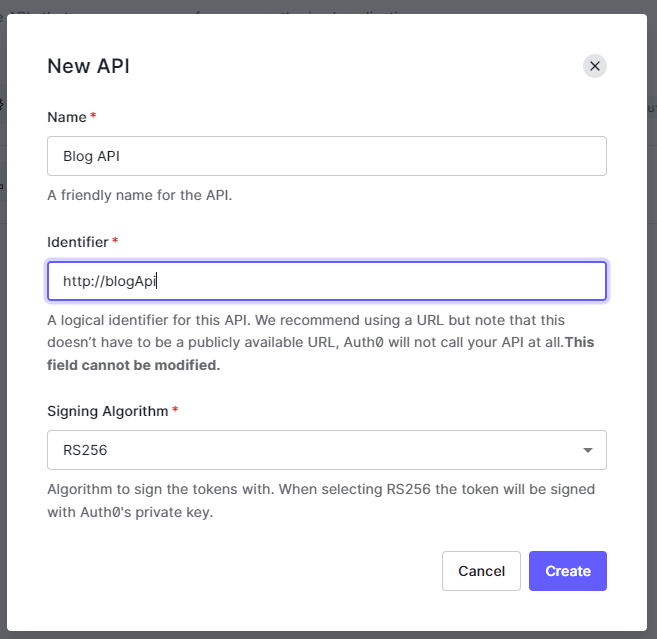
The name and identifier can be whatever you like. The identifier will be used later. Make sure the Signing Algorithm is set to RS256. When ready, push the ‘Create’ button. Next, it’s time to create the web API in .NET.
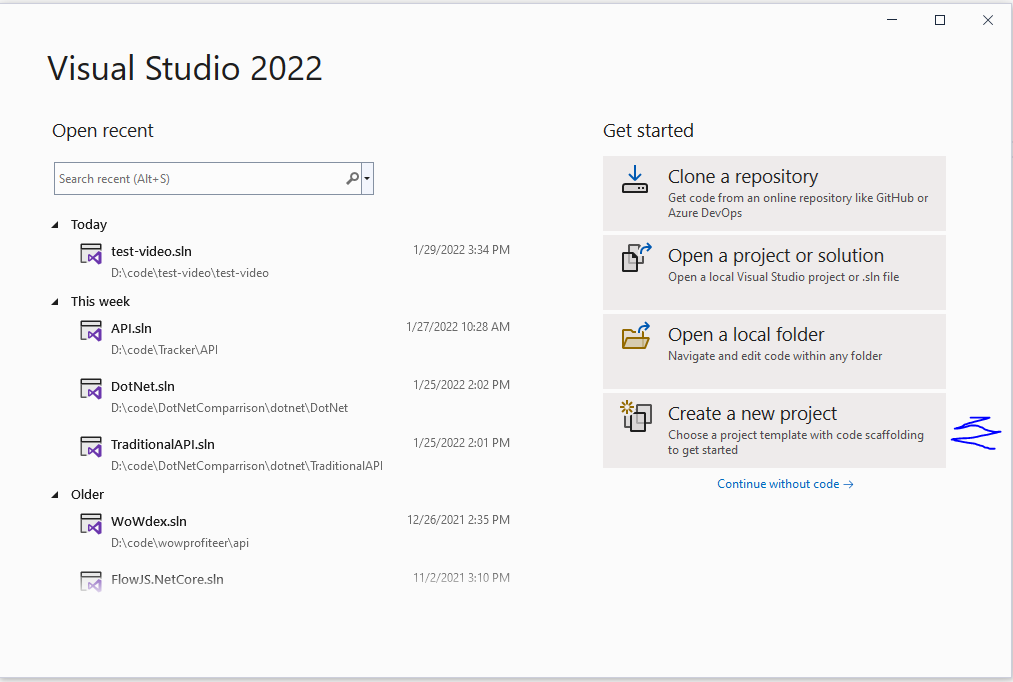
I’m using Visual Studio 2022 to create the API. If people would like, I could do this in VS Code in another post.
Inside Visual Studio select ‘Create a new project’.
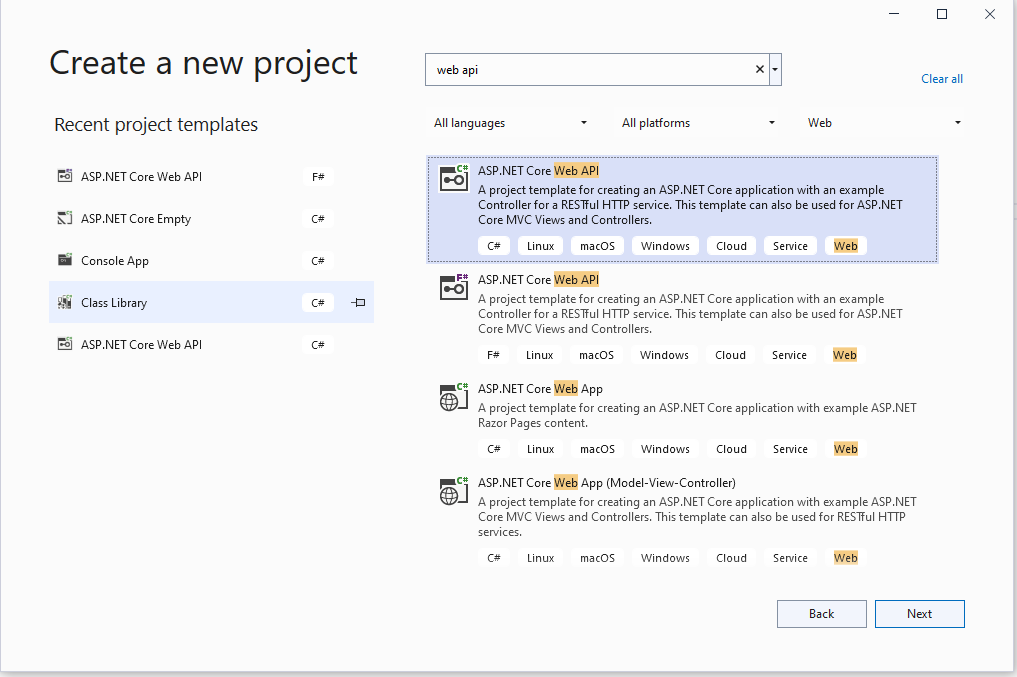
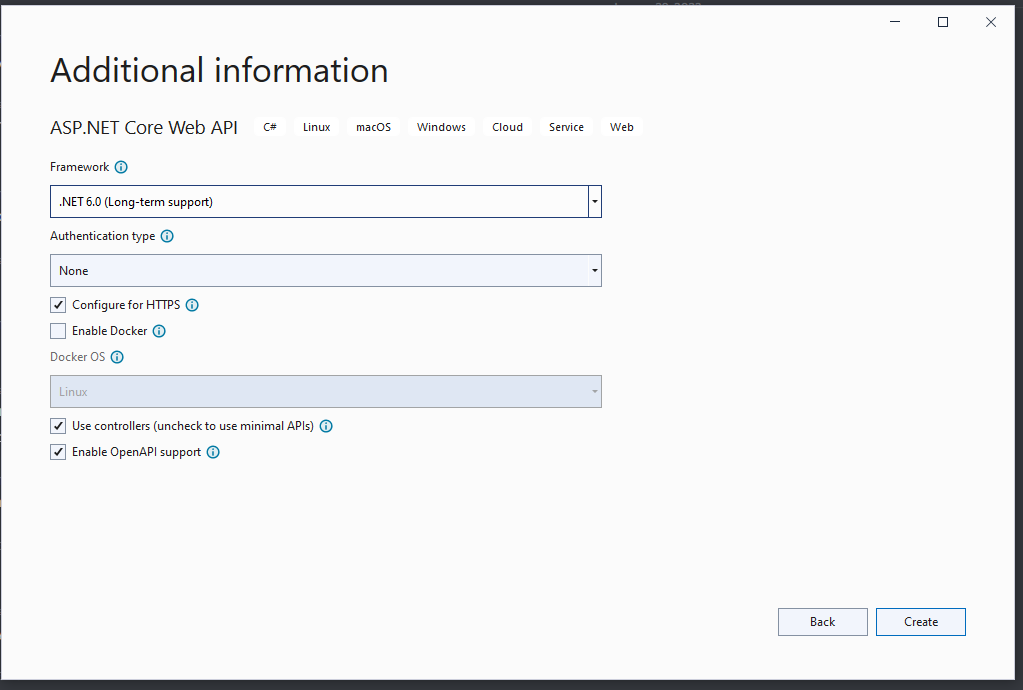
Next, select ‘ASP.NET Core Web API’. Make sure it’s the C# version. Press ‘Next’.
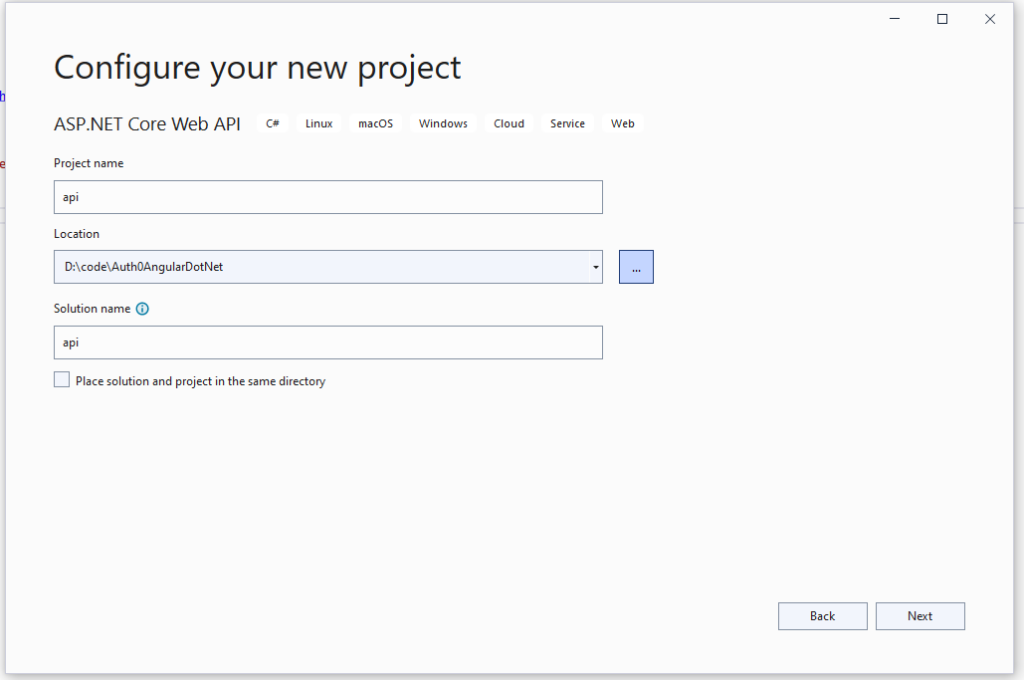
Next, name the project and place in the location that you desire then press ‘Next’.
Then Choose .NET 6.0 (Long-term support), set ‘Authentication type’ to None, ‘Configure for HTTPS’ is fine, and ‘Use controllers’ as well as ‘Enable OpenAPI support’ can be checked. Select ‘Create’.
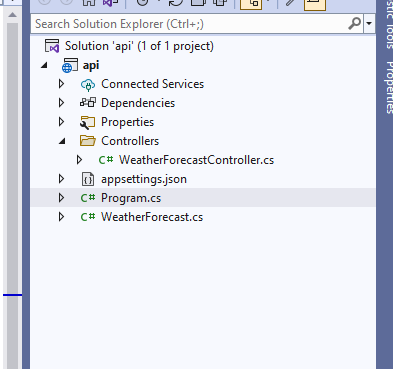
Your API layout should look something like this:
If you run the app, you’ll see the swagger API and there’s one endpoint currently setup (WeatherForecast). We will use the weather forecast endpoint later.
Now, we need to modify the appsettings.json file:
{
"JwtConfig": {
"Authority": "Auth0Authority",
"Audience": "Auth0Audience"
},
"Logging": {
"LogLevel": {
"Default": "Information",
"Microsoft.AspNetCore": "Warning"
}
},
"AllowedHosts": "*"
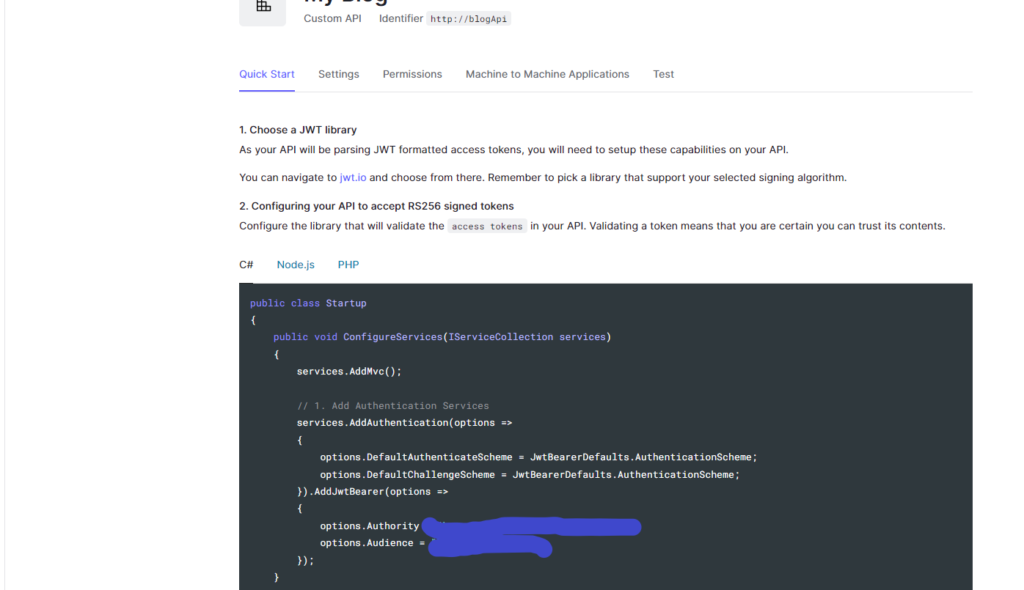
}Notice, I added a JwtConfig section that contains Authority and Audience variables. The Authority can be retrieved via the application that we setup in Auth0 in the first part, so inside of Auth0, navigate to Applications -> Applications and select the application that you created in part 1. If you select, ‘Quick Start’, it’ll provide the Authority and the Audience.
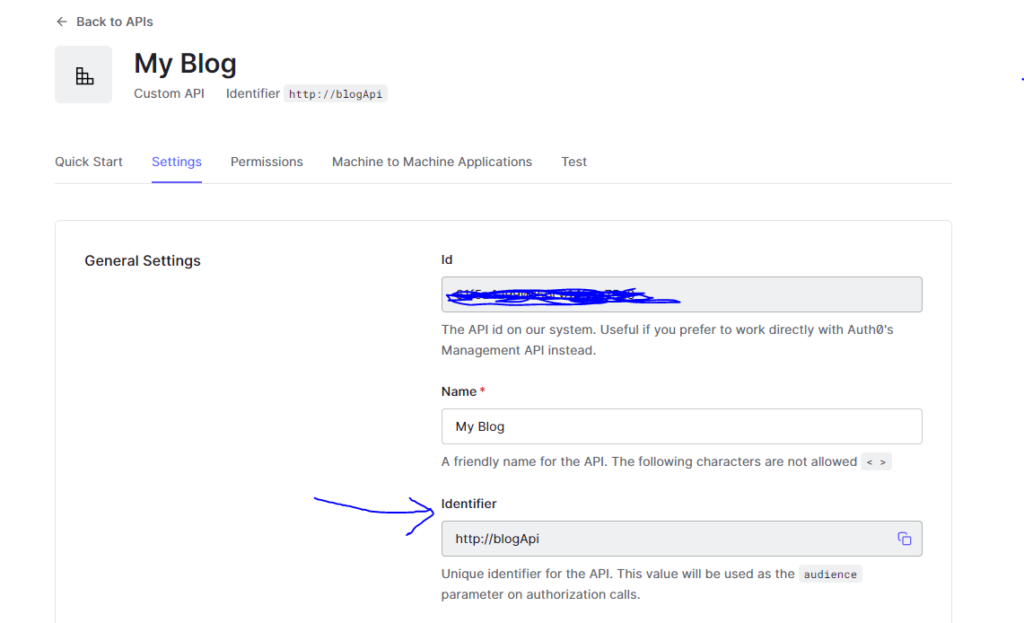
There are multiple ways to do everything. For example, the Auth0Audience variable, it be found in Auth0 if you navigate to Applications -> APIs and select the API we just created. Under ‘General Settings’, it’s the ‘Identifier’.
And the Auth0Domain can be found by selecting Applications -> Applications and selecting your application. Then there’s the domain variable:
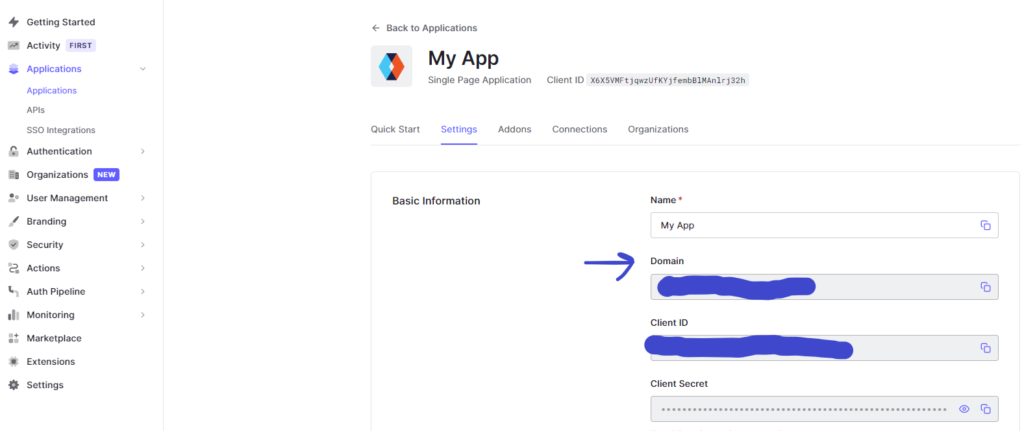
Note, you must prepend ‘https://’ before the domain variable.
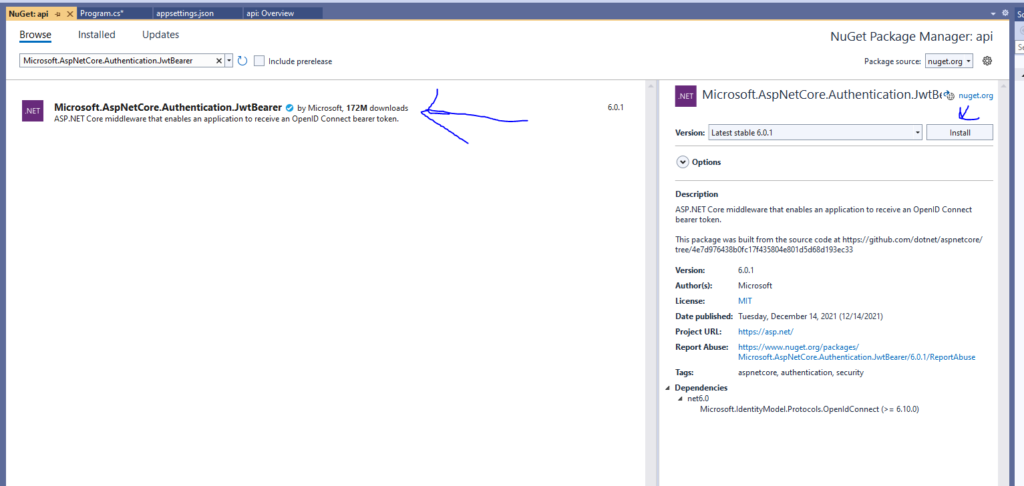
Next, I’ll install the JWT framework for .NET. So, right-click on the API project and select ‘Manage Nuget Packages’. Then click on the ‘Browse’ tab. Search for ‘Microsoft.AspNetCore.Authentication.JwtBearer’ and Select it and select ‘Install’.
Now that’s complete, we need to modify the Program.cs file. We need to load the Auth0 settings from appsettings and set the JWT configuration. Here’s the updated Program.cs file:
using Microsoft.AspNetCore.Authentication.JwtBearer;

var builder = WebApplication.CreateBuilder(args);

// Add services to the container.

builder.Services.AddControllers();
// Learn more about configuring Swagger/OpenAPI at https://aka.ms/aspnetcore/swashbuckle
builder.Services.AddEndpointsApiExplorer();
builder.Services.AddSwaggerGen();

builder.Services.AddAuthentication(options =>
{
    options.DefaultAuthenticateScheme = JwtBearerDefaults.AuthenticationScheme;
    options.DefaultChallengeScheme = JwtBearerDefaults.AuthenticationScheme;
}).AddJwtBearer(options =>
{
    options.Authority = builder.Configuration["JwtConfig:Authority"];
    options.Audience = builder.Configuration["JwtConfig:Audience"];
});

builder.Services.AddCors(options =>
{
    options.AddDefaultPolicy(
        builder =>
        {
            builder.WithOrigins("http://localhost:4200")
            .AllowAnyHeader()
            .AllowAnyMethod();
        });
});

var app = builder.Build();

// Configure the HTTP request pipeline.
if (app.Environment.IsDevelopment())
{
    app.UseSwagger();
    app.UseSwaggerUI();
}

app.UseCors();
app.UseAuthentication();
app.UseHttpsRedirection();

app.UseAuthorization();

app.MapControllers();

app.Run();
Notice the bold sections above. I added JWT authentication and set the Authority and Audience from the configuration file. Next, I add CORS (Cross Origin Resource Sharing) which is to allow the front-end to call the backend. I use ‘http://localhost:4200’ as the origin since that’s what Angular uses as the default URL when the web site spins up. This would need to be changed if you use a different start up URL. Also, note that I added ‘app.UseCors()’ and ‘app.UseAuthentication()’ towards the bottom. This sets the middleware and is required for it to work.
Next, in the WeatherForecaseController.cs file, I need to add the Authorize attribute on the class name. The controller can no longer be accessed unless a valid JWT has been provided (authorization).
using Microsoft.AspNetCore.Authorization;
using Microsoft.AspNetCore.Mvc;
namespace api.Controllers
{
[Authorize]
[ApiController]
[Route("[controller]")]
public class WeatherForecastController : ControllerBase
{
private static readonly string[] Summaries = new[]
{
"Freezing", "Bracing", "Chilly", "Cool", "Mild", "Warm", "Balmy", "Hot", "Sweltering", "Scorching"
};
private readonly ILogger<WeatherForecastController> _logger;
public WeatherForecastController(ILogger<WeatherForecastController> logger)
{
_logger = logger;
}
[HttpGet(Name = "GetWeatherForecast")]
public IEnumerable<WeatherForecast> Get()
{
return Enumerable.Range(1, 5).Select(index => new WeatherForecast
{
Date = DateTime.Now.AddDays(index),
TemperatureC = Random.Shared.Next(-20, 55),
Summary = Summaries[Random.Shared.Next(Summaries.Length)]
})
.ToArray();
}
}
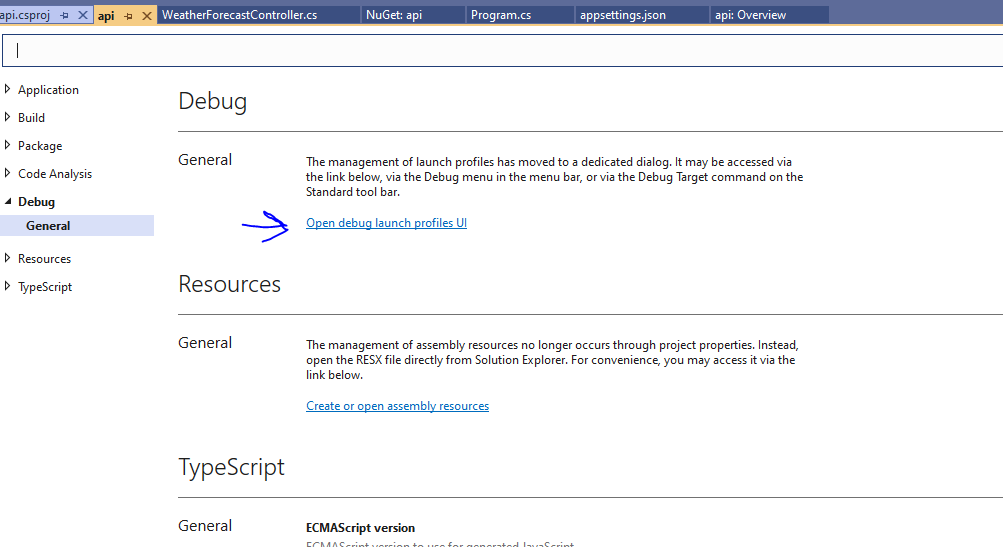
}Next, we need to retrieve the API URL so we can configure Angular to call it. Inside of Visual Studio, right-click on the API Project and select “Properties”. From there select Debug -> General and then click on the link that says “Open debug launch profiles UI”.
From there, scroll to the bottom and you will see “App URL”. I’m using the https URL:
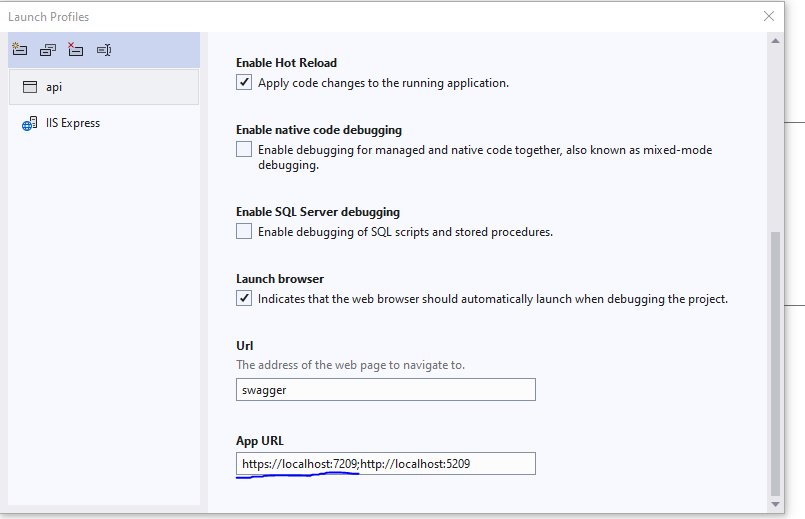
This is the URL that we will be using in Angular.
Starting from Part 1, we need to modify the environment file to contain the API URL that we retrieved in the previous step. So, open the environment.ts file and set the API URL like so (Note, I added a forward slash in the URL):
export const environment = {
  production: false,
  auth: {
    domain: 'Auth0Domain',
    clientId: 'Auth0ClientId',
  },
  ApiUrl: 'https://localhost:7209/'
};
The client needs the audience as well. Once again it be found in Auth0 if you navigate to Applications -> APIs and select the API we just created. Under ‘General Settings’, it’s the ‘Identifier’ (explained above). So, the updated environment.ts object should like something like this:
export const environment = {
  production: false,
  auth: {
    domain: 'Auth0Domain',
    clientId: 'Auth0ClientId',
    audience: 'Auth0Audience'
  },
  ApiUrl: 'https://localhost:7209/'
};
Next, we need to create the service which will be calling the API. From a terminal in the web folder (Angular) type:
ng g -service weatherThis will create the weather service. Now, lets edit the weather service (filename: weather.service.ts) to retrieve the forecast from the API:
import { HttpClient } from '@angular/common/http';
import { Injectable } from '@angular/core';
import { Observable } from 'rxjs';
import { environment as env } from '../environments/environment';

@Injectable({
  providedIn: 'root'
})
export class WeatherService {

  constructor(private http: HttpClient) { }

  public getWeather() : Observable<any[]> {
    return this.http.get<any[]>(`${env.ApiUrl}weatherforecast`);
  }

}
In this file, I inject the HttpClient in the constructor. The HttpClient is used to make HTTP calls to the API. Also, I imported the environment as env. And finally, I added the ‘getWeather’ function which returns an Observable of any[] (an array of anything) which uses the ApiUrl from the environment variable and calls the weather forecast endpoint.
To use the HttpClient, we need to add it to the app.module.ts file like so:
import { NgModule } from '@angular/core';
import { BrowserModule } from '@angular/platform-browser';

import { AppRoutingModule } from './app-routing.module';
import { AppComponent } from './app.component';
import { AuthModule } from '@auth0/auth0-angular';
import { environment as env } from '../environments/environment';
import { HttpClientModule } from '@angular/common/http';

@NgModule({
  declarations: [
    AppComponent
  ],
  imports: [
    BrowserModule,
    AppRoutingModule,
    HttpClientModule,
    AuthModule.forRoot({
      domain: env.auth.domain,
      clientId: env.auth.clientId
    })],

    providers: [],
    bootstrap: [AppComponent]
})
export class AppModule { }
I imported the HttpClientModule at the top and add it to the imports list. Simple enough.
Ok, we have two things left to make the front-end call the API. First, we need to inject the weather service into the app component and make the call (and display the response in the html file) next, we need to provide the JWT to the API to make the http call. One thing at a time.
First, lets configure the app to call the API. Navigate to the app.component.ts file, inject the weather service, make the service call, and save it to a variable:
import { Component, Inject } from '@angular/core';
import { AuthService } from '@auth0/auth0-angular';
import { DOCUMENT } from '@angular/common';
import { WeatherService } from './weather.service';

@Component({
  selector: 'app-root',
  templateUrl: './app.component.html',
  styleUrls: ['./app.component.scss']
})
export class AppComponent {
  public weather: any[] = [];

  constructor(@Inject(DOCUMENT) public document: Document,
  public auth: AuthService,
  private weatherService: WeatherService){
  }

  public getWeather() : void {
    this.weatherService.getWeather()
    .subscribe(weather => this.weather = weather);
  }
}
In the file, you can see that I first added a reference to the weather service. Then, I injected the weather service in the constructor. Also, I added a function called ‘getWeather’ that subscribes to the getWeather function on the weather service (which performs the http call) and saves the response to the weather variable which is of type any[] (array of anything).
Next, lets modify the app.component.html file to display the weather.
<div>
  <ng-container *ngIf="auth.isAuthenticated$ | async; else loggedOut">
    <button (click)="auth.logout({ returnTo: document.location.origin })">
      Log out
    </button>

    <div *ngIf="auth.user$ | async as user">
      <h1>Welcome!</h1>
      <h2>{{ user.name }}</h2>
      <h2>{{ user.email }}</h2>
    </div>
    <button (click)="getWeather()">Get Weather</button>
    <div *ngIf='weather'>
      <div *ngFor='let w of weather'>
       <div>{{w.temperatureC}} {{w.temperatureF}} {{w.summary}}</div>
      </div>
    </div>

  </ng-container>
  <ng-template #loggedOut>
    <button (click)="auth.loginWithRedirect()">Log in</button>
  </ng-template>

  <router-outlet></router-outlet>
</div>
So, I modified the app.component.html file to call and display the weather. I added a button that calls the getWeather function that I created earlier. Then, I check if the weather variable is valid (which I don’t HAVE to do in this scenario, but it’s always nice to be defensive) then, iterate through all of the items of the array (that’s the *ngFor) and I display the temperatureC, temperatureF, and summary for each item in the array. Note, this will only be called if the user is logged in (the first *ngIf statement above).
Ok, now the final step – adding the JWT to the request. So, Angular supports something called ‘http interceptors’. These intercept every http call and is able add anything to the call that’s needed (like the JWT authentication or other header variables). Auth0 has an http interceptor that will automatically add the JWT to the http call. This is nice. Let’s wire it up.
Modify the app.module.ts file like so:
import { NgModule } from '@angular/core';
import { BrowserModule } from '@angular/platform-browser';

import { AppRoutingModule } from './app-routing.module';
import { AppComponent } from './app.component';
import { AuthHttpInterceptor, AuthModule } from '@auth0/auth0-angular';
import { environment as env } from '../environments/environment';
import { HttpClientModule, HTTP_INTERCEPTORS } from '@angular/common/http';

@NgModule({
  declarations: [
    AppComponent
  ],
  imports: [
    BrowserModule,
    AppRoutingModule,
    HttpClientModule,
    AuthModule.forRoot({
      domain: env.auth.domain,
      clientId: env.auth.clientId,
      audience: env.auth.audience,
      httpInterceptor: {
        allowedList: [
          {
            uri: env.ApiUrl + '*',
            tokenOptions: {
              audience: env.auth.audience
            }
          }
        ]
      }
    })],
  providers: [
    { provide: HTTP_INTERCEPTORS, useClass: AuthHttpInterceptor, multi: true }
  ],
  bootstrap: [AppComponent]
})
export class AppModule { }
First, under the AuthModule.forRoot command, we add the httpInterceptor object that contains the allowedList array. This tells the interceptor which URLs to allow for adding the JWT. The uri is set to the ApiURL plus the ‘*’. This means any endpoint on the API URL will be used. It also sets the audience. Finally, under providers, we add the interceptor itself which is imported from Auth0 at the top.
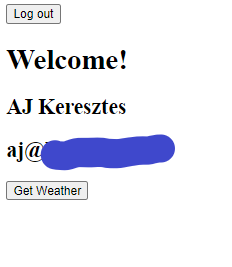
Lets test the app. First, run the API from within Visual Studio (F5). Then, run the Angular application via ‘ng serve’ from the command line. Next, login using the previously created login button. Once logged in, the screen should look like this:
From there, hit the ‘Get Weather’ button. Something like this should be displayed:

Great! The system is working with authentication! Angular logs in via Auth0, calls the API with the JWT in the header, and the API authenticates the JWT and returns the weather data. This is all that I was looking to accomplish in this blog series. I hope you enjoyed reading as much as I enjoyed writing it. Take care!